Konfigurationsbeispiel für Netgear VPN Client
Hier habe ich ein Konfigurationsbeispiel wie man ein VPN-Tunnel zwischen der FritzBox und einem Netgear VPN Client einrichtet.
Als Grundlage dient eine Standard-Konfigurationsdatei von FritzBox-Fernzugang-Assistenten.
Code:
version {
        revision = "$Revision: 1.30 $";
        creatversion = "1.1";
}


pwcheck {
}


datapipecfg {
        security = dpsec_quiet;
        icmp {
                ignore_echo_requests = no;
                destunreach_rate {
                        burstfactor = 6;
                        timeout = 1;
                }
                timeexceeded_rate {
                        burstfactor = 6;
                        timeout = 1;
                }
                echoreply_rate {
                        burstfactor = 6;
                        timeout = 1;
                }
        }
        masqtimeouts {
                tcp = 15m;
                tcp_fin = 2m;
                tcp_rst = 3s;
                udp = 5m;
                icmp = 30s;
                got_icmp_error = 15s;
                any = 5m;
                tcp_connect = 6m;
                tcp_listen = 2m;
        }
        ipfwlow {
                input {
                }
                output {
                }
        }
        ipfwhigh {
                input {
                }
                output {
                }
        }
        NAT_T_keepalive_interval = 20;
}


targets {
        policies {
                name = "[COLOR="Red"]DYNDNS-ADRESSE[/COLOR]";
                connect_on_channelup = no;
                always_renew = no;
                reject_not_encrypted = no;
                dont_filter_netbios = yes;
                localip = 0.0.0.0;
                virtualip = [COLOR="Green"]192.168.178.201[/COLOR];
                remoteip = 0.0.0.0;
                remotehostname = "[COLOR="Red"]DYNDNS-ADRESSE[/COLOR]";
                localid {
                        user_fqdn = "[COLOR="Red"]USERNAME[/COLOR]";
                }
                mode = mode_aggressive;
                phase1ss = "all/all/all";
                keytype = keytype_pre_shared;
                key = "[COLOR="Red"]KEY[/COLOR]";
                cert_do_server_auth = no;
                use_nat_t = no;
                use_xauth = no;
                use_cfgmode = no;
                phase2ss = "esp-all-all/ah-none/comp-all/pfs";
                accesslist = "permit ip any [COLOR="Blue"]192.168.178.0 255.255.255.0[/COLOR]";
                wakeupremote = no;
        }
}


policybindings {
}
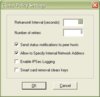
1. Zuerst muss man die Option "
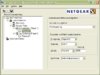
Allow to specify Internal Network Address" unter Options->Global Policy Settings aktivieren(siehe
Bild 1).
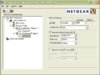
2. Jetzt legt man eine neue Verbindung an.
3.
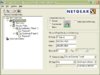
Bild 2 Als "
ID-Type"(oben) wähl man
IP-Subnet und in den nachfolgenden Felder werden die blau hinterlegten Daten eingetragen .
4. "
ID-Type" (unten) "
Any" und "
Gateway Hostname" und in das Feld darunter die DYNDNS-Adresse der FritzBox.
5.
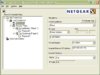
Bild 3 Unter "My Indentity" wählt man "
None" als "
Select Certificate"
6. Durch Klicken auf "Pre-Shared Key" gelang man zur Key-Eingabemaske
7. Als "
ID Type" Auswahl "
E-mail Address" und in das Feld darunter den "Username"
8. Unter "
Internal Network IP Address" trägt man die blau hinterlegte IP aus der Konfig-Datei.
9.
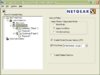
Bild 4 wählt man "
Aggressive Mode" und "
Enable Perfect Forward Secrecy (PFS)"
10.
Bild 5 und
Bild 6 für Phase1 und Phase2 muss man noch die "
SA Life" aktivieren.
@MOD: vielleicht macht Ihr ein eigenes Thread zu diese Thema und fügt den Beitrag
Greenbow Client noch hinzu.